Introduction
Welcome to the Cloud Native Applications on Kubernetes course. Before getting started, please make sure you have read the following information:
- Courses Homepage for information about the Course Info
- Lecture slides for more detailed Course Information.
- Lab materials
- Scoring (You can login with ut.ee username/password)
- ETAIS Self Service
For any questions, using the Slack channels is recommended, as it also makes answers visible to other people.
Practical labs
Lab sessions take place during their allotted times. A new topic is published after the week's lecture and that's the topic for the lab that week.
There is no hard deadline for labs except a week before the exam, but do consider the fact that the workload is quite large and cannot be done in a few days, especially as you are going to be facing issues and problems.
Practical sessions have been designed to be highly hands-on, but mostly independent - students get guides with thorough explanations about the task at hand, which they can freely do either at home or during the practical sessions. The practical sessions are there to help with any issues encountered.
Course environment
The labs are scored automatically by an automated system, which checks the students environment for specific task completions by probing endpoints in the environment for responses that should be there.
This scoring system is available from this link: Scoring. Once logged in, continue to Host groups in the leftmost panel, and there should be at least localhost defined there.
At first, there won't be a machine related to you, as you've not set it up yet.
This kind of automated scoring might not be perfect, as there are quite a few ways a task might be understood and done. If you feel the check is wrong or don't understand why it's not succeeding for your task, ask the teachers in Slack.
Setting up the personal environment
In this course, you are going to be installing and administrating your own Kubernetes cluster, but before you can do that, you'll need an environment to install the Kubernetes to.
You are going to be using virtual machines for this, provided by the ETAIS cloud service. ETAIS’s main aim is to serve Estonian students and researchers.
For access, you'll have received an email with instructions on how to log in. You are also invited into the Cloud Native Applications on Kubernetes organization, and have a private project in that organization.
After setting up the virtual machine, you'll also need to register it with the scoring server.
ETAIS
Before you can create your virtual machines, make sure you can access the self-service environment here: ETAIS
Complete
- Go to the ETAIS self-service page.
- Login by clicking
Sign in with MyAccessID - After that search for your institution (University of Tartu) and enter your (UT) username and personal password.
- PS! If you prefer other options might work also ID card, Mobile ID, or another institution's username and password, and so on, but it is up to you to get them working.
- Look for a way to change organization (top left icon).
- Select workspace and your project.
- If not available please go to the personal e-mail you provided to University as the primary contact e-mail and look for an e-mail from
selfservice@etais.eeand click on a linkthis pagein it. - If still having problems please contact your lab instructor.
Verify
If you did successfully login, you should be able to see the ETAIS Dashboard as follows:
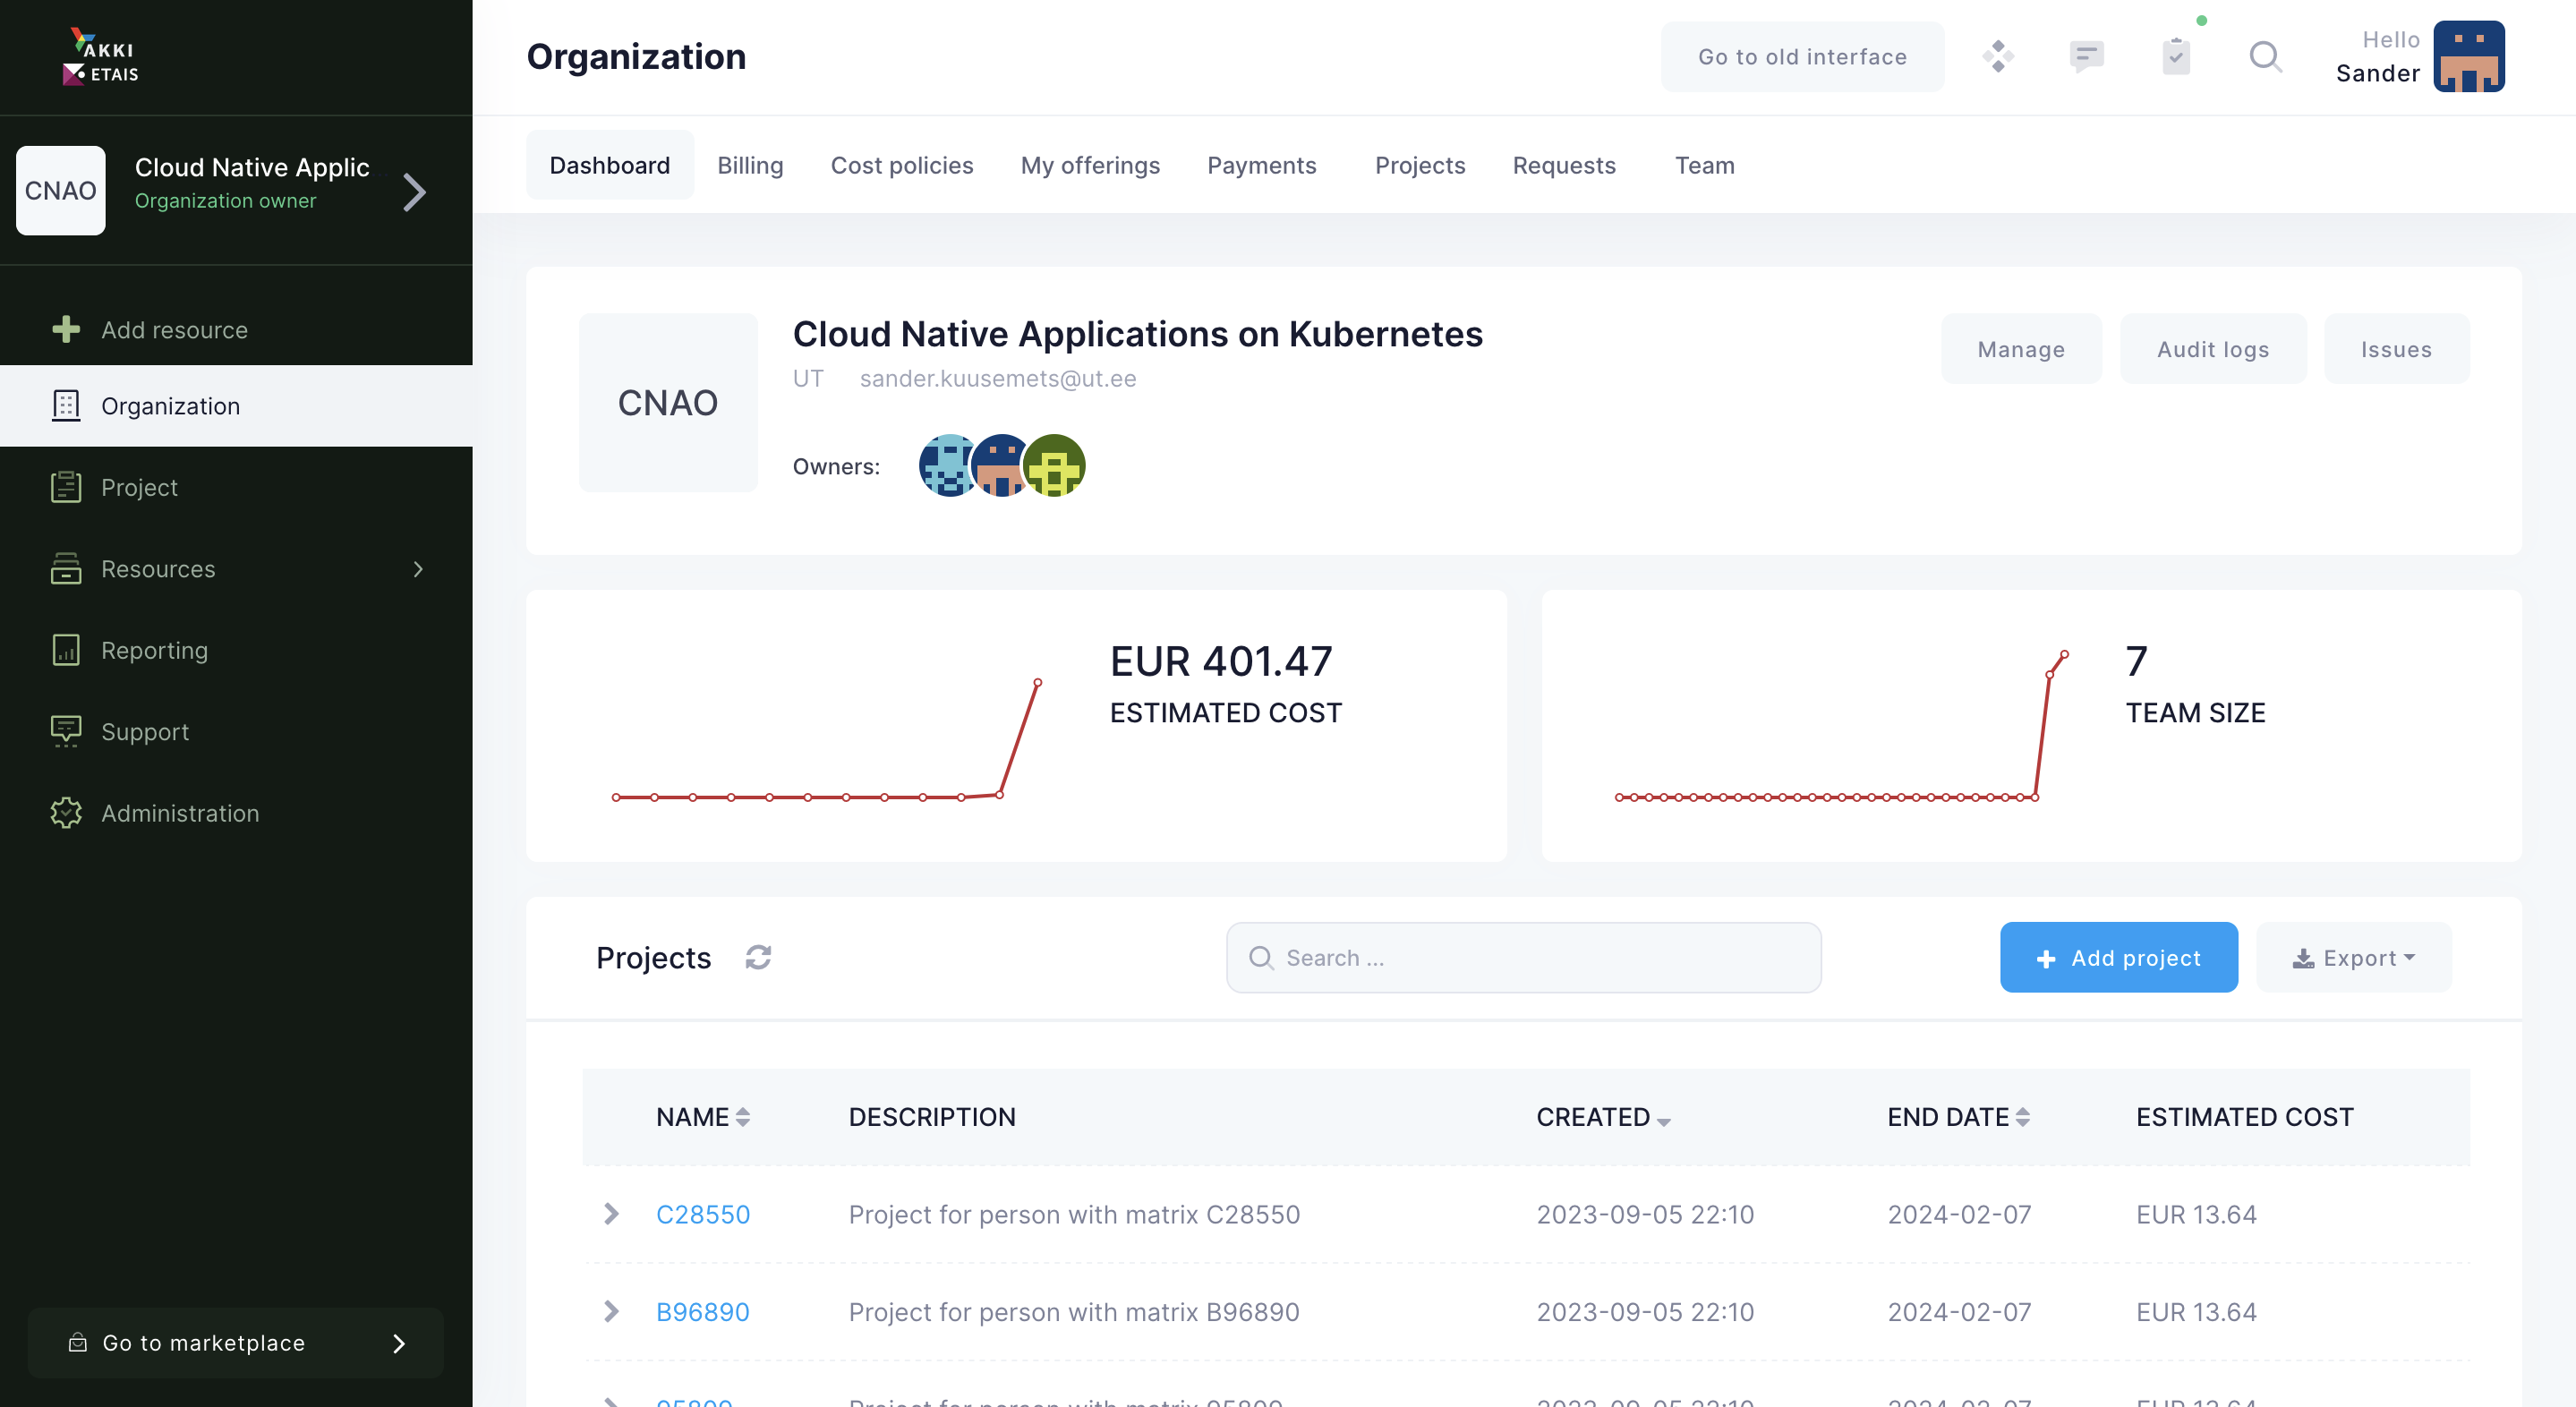
If everything works, you are ready to create a personal virtual machine. There's two steps involved - creating an SSH key, and making the machine.
Creating a public/private SSH key pair
Before you continue you need to set up a public/private key pair so you could use them to connect to the machine.
Public key cryptography, or asymmetrical cryptography, is any cryptographic system that uses pairs of keys: public keys which may be disseminated widely, and private keys which are known only to the owner. This accomplishes two functions: authentication, where the public key verifies a holder of the paired private key sent the message, and encryption, where only the paired private key holder can decrypt the message encrypted with the public key.
In a public-key encryption system, any person can encrypt a message using the receiver's public key. That encrypted message can only be decrypted with the receiver's private key. More on that here.
Danger
- Make sure you do not lose this key, once Your VM has been created the only way to change the key is from inside the VM.
- If you lose your copy and are locked out of the VM, you will have to create a new virtual machine!
Now to actually create the key pair. How to go about creating the keys depends on the operating system you use. With Linux/MacOS it's rather straightforward, with Windows you have a choice between using WSL and PuTTY.
Attention
This should be done on your personal computer.
- Open command line
- Use
ssh-keygencommand to generate the 4096 bit long RSA key. Try to figure out the proper command options you want to use.- If asked where to store the key you can useuse the default location of:
${HOME}/.ssh/id_rsa - If asked about a password you may consider protecting the private key using a passphrase for stronger security, but it is also OK to leave it empty for this course (in this case the private key has to be kept really secret).
- Now two files should be added into
.ssh/directory of your home folder:id_rsawhich is a private key and should be kept secret.id_rsa.pubwhich is a public key and may be shared.
- Once the key pair is generated we may set up the SSH server to use public-key authentication:
- Copy public-key to memory and then continue with the manual on where to paste it in ETAIS:
$ cat ~/.ssh/id_rsa.pub
- If asked where to store the key you can useuse the default location of:
- Use Puttygen application to generate the key pair:
- Download Puttygen
- Set the password for the private key and save it to your computer.
- Copy the puttygen
public keyoutputand paste it to theETAIS(next part in manual). -
NB! Do not save the public key into a file and copy it to the server, it will not work, it has a different format.
- Puttygen info
Complete
- Log Into ETAIS
- On the right top click on your name,
Credentials->SSH keys - Right side of the screen look for
Add keyand click on it - Add a name to your SSH key that should contain your
Last name - Paste your public key and click
Import key
Once the public key is successfully added, you should be able to see it in the list of SSH Keys.
Starting a virtual machine
Now that you have a way to setup authentication, you can start a virtual machine.
Before you create a machine, please decide on an alias. This alias can be anything that already does not exist in the host list of the scoring.
You can use your Student Book Number, username, real name, an animal, a random alphanumeric string - but no punctuation, and no spaces.
Danger
This alias will be visible in the scoring together with how much of the labs you've completed.
If you choose an alias that makes you identifiable (username, student book number, real name), then you have agreed to being identified, from a data protection viewpoint.
Complete
- Choose your organization
Cloud Native Applications on Kubernetes->Your personal project - On left menu go to
Resources->VMs->Add Resource->Virtual Machine in <your project name>VM name=the alias you choseImage=centos9Flavor=g4.r8c4System Volume Size= 100 GBSystem Volume Type=prod3 (IOPS intensive SSD)Data Volume Size= Press the delete button next to itSSH public key=the public key that you created beforeSecurity Groups= addsshandping(can be done by clicking in white area afterdefault)Networks= changeSkip floating IP assignmenttoAuto-assign Floating IPDescription=Add your Full name, student book number and course name. This info will be visible only to teachers.- You can find your Student book number at my data page in courses portal
- Check everything twice and press
Add to cart. - Finish the VM creation by pressing
Purchase.
Verify
Once the VM is successfully created it should be visible in the list of VMs in ETAIS (Resources -> VM in the left-most menu) and have an External IP.
The external IP for your machine is given from the campus network subnet. This means that your machine is accessible from only inside the University network - for example with VPN.
You should now be able to SSH into the machine, at the external IP address. In a bit of time, also <alias>.cloud.ut.ee DNS address should start working.
Warning
To access your newly created Virtual machine you need to be inside of University of Tartu network. In the classroom or inside the University of Tartu eduroam network it is possible to access your machine without a VPN, but we do recommend setting up a VPN for remote access outside the University network.
Logging into your virtual machine (SSH)
Secure Shell (SSH) is a cryptographic network protocol for operating network services securely over a network. The best-known example application is for remote login to computer systems by users.
SSH provides a secure channel over an unsecured network in a client-server architecture, connecting an SSH client application with an SSH server. Common applications include remote command-line login and remote command execution, but any network service can be secured with SSH. More on that here.
Connecting to Cloud resources (VM-s) over SSH is preferred. The other option is to use the slow network console from minu.etais.ee, but usually this is reserved for emergency purposes. The problem with the network console is that you cannot copy/paste to it, and can have only one terminal open.
In macOS and Linux hosts the ssh client is by default installed and accessible in the command line. Starting with Windows 10, a Linux subsystem was created that runs a pseudo-VM in Windows, which also has ssh installed by default. To access the remote shell of example.com host and user test the following command should be provided:
$ ssh test@example.com
Verify
- Try accessing the remote shell of your VM using the
External IP addressof your machine. The username you should use iscentos. You do not need a password since we are using key-based authentication. If all is good, your login should work, and you should be given a shell inside the machine. - If you generated a new key or the key does not authenticate properly, you must re-create your VM with the correct keys, as the key is modified only during VM creation.
ssh <user>@<external_IP>- The SSH server should not ask for password anymore.
- NB! If you specified a password on your SSH key, it may ask for that!
- If needed use
-iparameter to specify key file.
Download Putty. Putty is a portable executable, so just open Putty.exe.
Testing the public key authentication
First of all, make sure you know the IP of your newly created VM. It will be something like 172.17.XXX.XXX
Instead of username and password let's use the key we generated earlier. Now you should be able to login to your VM over SSH using the private key:
Complete
- Use
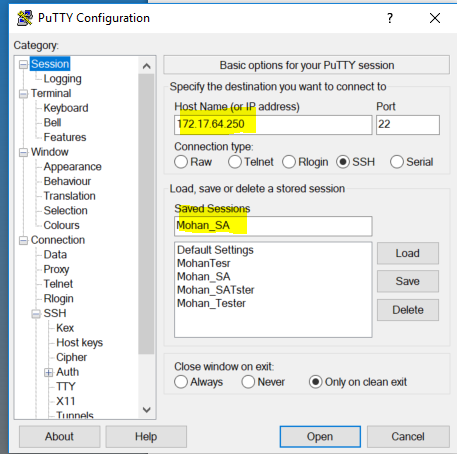
PuTTYand set up a new saved session:- On the putty startup screen write your
External IPaddress172.17.64.Xinto tohost namefield - this will be the session name (so you can reuse it later). - Click on the
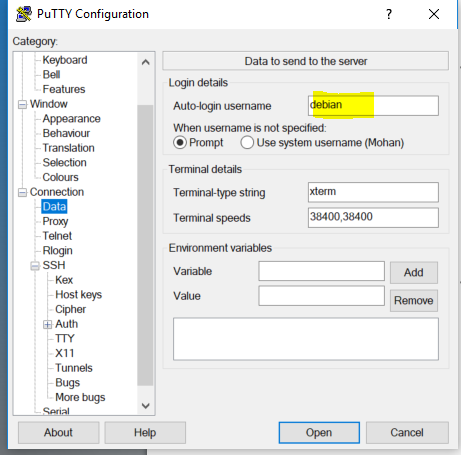
Connection(in the left vertical panel) then chooseData.- Write the
loginof youruser(we will be usingcentos).
- Write the
- On the putty startup screen write your
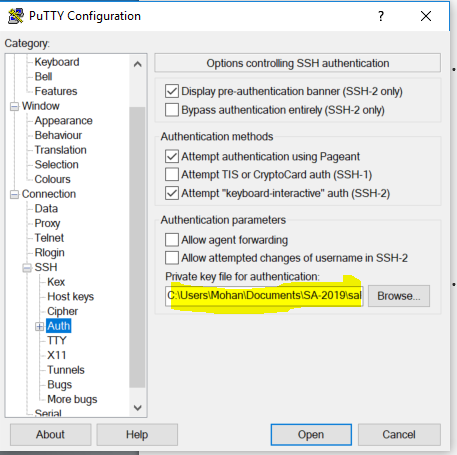
- Under
Connection->SSH->AUTH, browse for theprivate keyyou generated with thePuTTYgen. - Go back to the
Sessionsubmenu, add a name you like inSaved Sessionsbox and clickSave.
Now the saved session can be used:
Verify
- Use the
PuTTY: - On the putty startup screen, in the
Saved Sessionsbox select your saved session, then clickLoad - Click
Openon the main window. - The SSH server should not ask for a password.
- NB! If you specified a password on your SSH key, it may ask for that!
Consul
Now that you can access your machine, your scoring server needs to find your machine somehow. For this, a tool called consul has been setup in the Scoring server, in the server role.
You're going to need to install consul in client role, for it to connect to the consul server.
consul, among other things, registers itself to the existing cluster, and makes it's name and IP address visible to the scoring server.
Installing consul requires downloading it, setting up the necessary configuration, binary and system files, and starting it.
Info
You may need wget and unzip packages to complete the following part. In CentOS, we use the dnf package manager, so make sure to install the packages like this:
dnf install wget unzip
Warning
NB! Do not install Consul using package manager. Use the following steps to install it manually.
Complete
- Start by going to the Hashicorp website
- Download the
AMD64version of the binary in your VM, by usingwgetorcurl. (Linux version!). Do not use package manager! - Unpackage the file using
unzip. - Copy the binary to
/usr/local/bin, and set it's ownership toroot. - Make sure the permissions are
0755for the binary. - Add a system user
consul, by doinguseradd --system consul. - Make a configuration directory at
/etc/consuland a data directory/var/lib/consul. Make sure they are owned byconsul. - Add the following configuration file at
/etc/consul/config.json:
{
  "client_addr": "0.0.0.0",
  "datacenter": "k8s",
  "data_dir": "/var/lib/consul",
  "domain": "k8s",
  "dns_config": {
      "enable_truncate": true
  },
  "enable_syslog": true,
  "encrypt": "i5GSG0lNrO+gCBdW67tqTd6qctc2pqFHOt97Z9yiIss=",
  "log_level": "INFO",
  "rejoin_after_leave": true,
  "server": false,
  "retry_join": [
      "172.17.90.165"
  ],
  "ui": false
}
- Now, we have finished configuring
consulitself. You'll also need asystemdunit file, to be able to control start and stop of the service. - Add the following to the file at
/etc/systemd/system/consul.service:
[Unit]
Description="HashiCorp Consul - A service mesh solution"
Documentation=https://www.consul.io/
Requires=network-online.target
After=network-online.target
ConditionFileNotEmpty=/etc/consul/config.json

[Service]
User=consul
Group=consul
ExecStart=/bin/bash -c "/usr/local/bin/consul agent -advertise=$(curl -s http://169.254.169.254/latest/meta-data/public-ipv4) -node=$(curl -s http://169.254.169.254/latest/meta-data/hostname | awk -F '.' '{print $1}') -config-dir=/etc/consul/"
ExecReload=/usr/local/bin/consul reload
KillMode=process
Restart=on-failure
LimitNOFILE=65536

[Install]
WantedBy=multi-user.target
- The
ExecStartline makes sure to start the VM on the external IP address. Otherwise it will listen only on the192.168.42.1/24subnet interface inside your machine, and won't be accessible from the outside world. - You should now be able to start the service by doing
systemctl daemon-reloadandsystemctl enable --now consul.
Validate
Your machine should now be visible in the scoring, as a new host. Don't worry about it being unavailable, down or anything else in the scoring UI, you're going to fix it in a second.
You can also check the status of the cluster via /usr/local/bin/consul members. You should see at least a machine called nagios.openstacklocal in the list.
Changing firewall rules
As is standard with cloud based virtual environments, the user can define their networking policies by using a form of firewall rules.
Because of the which rules are used by default ETAIS (SSH), you'll need to apply some rules to your machine, for it to be able to receive pings and consul service related traffic. Namely, you need to open ICMP and 8301/tcp+udp.
First, you'll add a security group to the VM to open ICMP.
Complete
Go to ETAIS -> Your project -> Resources -> VMs -> click Actions on your VM -> Update security groups -> select ping -> add it -> Submit.
This security group opens your virtual machine for ICMP traffic. In a few minutes, you should see your first test become green in the scoring website.
Secondly, just to avoid problems in the future, open the port 8301/tcp+udp for two-way consul traffic.
Complete
Go to ETAIS -> Your project -> Resources -> Private clouds -> click on the name of your private cloud -> Security groups under the Networking section -> Detailed view.
Here, create a new security group by going Create -> give it a good name -> Add rule. You will need two rules - an IPv4 ingress rule on port 8301 on both TCP and UDP protocols.
You can leave the remote cidr, remote security group and description empty. After submitting this, you will need to do the same steps you did with the ping rule, where you also need to add this new rule to your virtual machine.
Validate
You can validate the ports are open and work by checking the scoring website. Your machine's ping task should be green.
You can also ping the machine yourself (from your own computer), or run a port scan against port 8301/tcp. (why not UDP?)
Scoring access
For scoring to work properly, you'll need to give teachers and the scoring server access to your virtual machine. You'll also need a root user password, so if something goes wrong, you can login to your machine via the ETAIS console, and fix it.
Complete
- Add new user called
scoring(DO NOT give it a password) $ sudo adduser scoring
Now, give the lab instructors and automated scoring system access to your VM over SSH using a scoring account. The public key for the scoring user is available for download here, and it works exactly like your own public-private key pair for ssh. Download scoring user's public key
Complete
- Now in your VM please log in to
scoringaccount you have just created, or just switch to it usingsu - scoringcommand. (If you get a permission denied error, think a bit - you need elevated permissions to log to a new user without confirming a password(which we don't have)!) - Now download the scoring server's public key in your VM, use the
wget(you might need to install it) command for that: scoring@host:~$ wget https://scoring.k8s.cs.ut.ee/files/id_rsa.pub- Alternatively, you can put the URL into your browser and copy it from there.
Now, add the downloaded public key to the list of authorized keys for scoring account:
Complete
-
If directory
.sshdoes not exist in scoring's home, please create it.scoring@host:~$ mkdir .ssh
-
Make sure the directory is owned by scoring user and '''only''' it can read-write-execute in it
# chown scoring:scoring .sshand# chmod 700 .ssh
-
Copy the contents of
id_rsa.pubinto.ssh/authorized_keysscoring@host:~$ cat id_rsa.pub >> .ssh/authorized_keys
-
Make sure the files are in appropriate permissions
.sshfolder in Read-Write-Execute only permissions forscoringuser only (no permissions for others)authorized_keysin Read-Write permissions '''only for thescoringuser'''
Verify
If everything was done properly the remote scoring can now log in using its private key. You, unfortunately, cannot test it manually, but you should see that in a few minutes from the scoring board.
Complete
Check that the package sudo is installed
- Rely on sudo documentation and make changes so that the scoring user can:
- Execute sudo command without asking for password
centos@test:~$ sudo visudoand addscoring ALL=(ALL:ALL) NOPASSWD: ALL # under where users like root are specified
- Depending on your editor, you need to know how to save the file.
- Default is
vim.
Take care in not making syntax errors, as this can break system functionality.
Verify
Ideally, the following should just list files without any additional prompts, under scoring user:
scoring@host:~$ sudo ls -l /root
Note the user under which the command was run.
Password for root user
VMs in ETAIS by default come without passwords - meaning you can only gain access to the VM with the correct key pair. In this course, the root user should have a password, as it allows for disaster recovery in case something happens to your key or virtual machine, through the web console.
Complete
- Become root user:
sudo su - - As a
rootuser set the password:passwd root
You will be prompted to enter the password twice, don't be alarmed when you can't see your password being typed on the screen. It's a security feature of Linux as to not give away the length of your password. Also make sure you remember or write down the password, in case you need it.
Verify
Go to ETAIS next to your VM's name choose Actions and from the drop-down menu choose Open console. This will cause a pop-up to open a new tab. You might need to allow pop-ups for ETAIS in your browser (you will be prompted to do so).
Click inside the black console box to force it into focus and try to log in with user root and the password you just set.
Linking your VM to student book number
Due to the fact that you are allowed to use any VM name possible, there needs to be a connection between your VM name and actual person.
Complete
Make a text file /etc/identity. Fill in the following template, and put it into /etc/identity:
VM name: <your_VM_name>
Matrix number: <your_student_book_number>
In this exact format, as we will be parsing this with scripts.
This lab is now complete once all the checks in the scoring server have turned green.
Lab Use Case
In the labs, we will implement a microservice-based application for calculating what is the optimal time to turn on electrical devices based on the next day electricity market prices.
Users will specify how long they want to run some electrical device (for example, 4 hours) and the application will respond with a time period (for example, 02:00 - 06:00) when it would be the cheapest (in the next 24 hours) to run an electrical device for a 4 hour period.
The application will consist of the following main components:
- Electricity price fetcher service - A Cron service that fetches next-day electricity price data from
EleringAPI. - History server - stores price data and makes it available for other components.
- Application server - responds to use requests and computes the optimal time to turn on devices for a specific amount of hours.
- Front-End - graphical web interface for the users.
Implementing electricity price fetcher service
We will start implementing the first microservices of our application: the electricity price fetcher service.
Complete
- Implement an application or a script that sends an HTTP request to the Estonian electricity price API of Elering
- After fetching result, store the data as a CSV file on the local virtual machine (VM) disk.
- You can choose any programming language, but Python or Go are reasonable choices.
The solution that you will implement in this lab can be visualized as following:

Warning
NB! If you get stuck with implementing the use case components, ask for help from the lecturers.
Electricity price API information
The OpenAPI documentation for the electricity price API is available here: https://dashboard.elering.ee/assets/api-doc.html#/nps-controller/getPriceAsCSVUsingGET
For example, you can use the /api/nps/price/csv endpoint to fetch day-ahead electricity prices from the Elering API:
- API host:
dashboard.elering.ee - API endpoint:
/api/nps/price/csv - Method:
GET - Parameters:
start:datetimein ISO UTC format- For example, 2024-09-03T21:00:00Z UTC time represents Estonian time of 2024-09-04T00:00:00+03:00
end:datetimein ISO UTC format- For example, 2024-09-04T21:00:00Z UTC time represents Estonian time of 2024-09-05T00:00:00+03:00
fields:ee(prices for Estonia)
- Example of a full API endpoint URL with parameters: https://dashboard.elering.ee/api/nps/price/csv?start=2024-09-03T21:00:00Z&end=2024-09-04T21:00:00Z&fields=ee
We are only interested in the Estonian (ee) electricity day-ahead price data.
Info
Configure a Cron job on your VM:
- Create a script file, e.g.
/root/script.py - Execute the
crontab -ecommand - Add the following line:
0 13 * * * /usr/bin/python /root/script.py - Save the changes in the editor, it will write the content to the crontab file
- Verify the changes:
$ crontab -l
0 13 * * * /usr/bin/python /root/script.py
This will register a Cron job, which runs /usr/bin/python /root/script.py command every day at 13:00 UTC time. In the example, we use python script script.py and python binary, while in your case you can choose any technology you like.
NB! If your prices file is empty, you might have to make the script file run a bit later, depending on when exactly the next day prices are updated in the Elering API.
Verify
The API responce CSV content should look something like this:
"Ajatempel (UTC)";"Kuupäev (Eesti aeg)";"NPS Eesti"
"1725397200";"04.09.2024 00:00";"99,96"
"1725400800";"04.09.2024 01:00";"105,69"
"1725404400";"04.09.2024 02:00";"100,16"
"1725408000";"04.09.2024 03:00";"85,3"
"1725411600";"04.09.2024 04:00";"99,75"
"1725415200";"04.09.2024 05:00";"100,77"
"1725418800";"04.09.2024 06:00";"110,5"
"1725422400";"04.09.2024 07:00";"147,88"
"1725426000";"04.09.2024 08:00";"181,3"
"1725429600";"04.09.2024 09:00";"154,33"
"1725433200";"04.09.2024 10:00";"125,13"
"1725436800";"04.09.2024 11:00";"107,21"
"1725440400";"04.09.2024 12:00";"88,82"
"1725444000";"04.09.2024 13:00";"85,23"
"1725447600";"04.09.2024 14:00";"86,01"
"1725451200";"04.09.2024 15:00";"79,96"
"1725454800";"04.09.2024 16:00";"88,66"
"1725458400";"04.09.2024 17:00";"109,61"
"1725462000";"04.09.2024 18:00";"149,96"
"1725465600";"04.09.2024 19:00";"190"
"1725469200";"04.09.2024 20:00";"303"
"1725472800";"04.09.2024 21:00";"181,95"
"1725476400";"04.09.2024 22:00";"127,29"
"1725480000";"04.09.2024 23:00";"82,04"
"1725483600";"05.09.2024 00:00";"52,18"
Complete
- Fix the timezone of the VM and set it to UTC timezone:
sudo timedatectl set-timezone UTC
- Once you have the script ready and tested, deploy the script as a Cron task inside the VM.
- Configure it to run day at 15:00 Estonian time or 11:00 UTC (It should become available by then) and fetch the next day prices.
- For example, the script runs on Tuesday at 15:00 and asks for the Electricity prices of Wednesday from 00:00 to 24:00.
- The price data should be stored as a CSV file at
/tmp/prices.csv