Lab 3 - Kubernetes setup
Overview
Welcome to the third lab of the Cloud Native Applications on Kubernetes course. This is the lab where you finally get started on Kubernetes:
This week's tasks:
- Install Kubernetes
- Setup the cluster management software
- Install control plane
- Install client tools
- Install the CNI
- Setup two VMs for the worker nodes
- Install the worker nodes
- Test Kubernetes by creating a single container
- Test networking by creating a single service
- Detailed usage of client tools
Kubernetes
What's Kubernetes?
The containerization lab showed that running a container is a relatively simple task. However, running containers across multiple hosts, scaling them up or down, managing, and deploying, and publishing them to the outside network reliably, among other things, can be difficult without some extra tools.
Kubernetes is a tool that aims to solve all these problems by defining a set of API endpoints and resource objects, and asking all software, hardware and tools to confer to those definitions. This allows the integrations between tools be fully intended and documented out of the gate, as the integrations follow the same API definitions.
Then, Kubernetes defines a set of components it needs, to provide these API endpoints and track the defined resource objects, convert them into actionable items on a lower abstraction layer (container engine and OS), and run these workloads and tasks on those.
Terminology
There is a set of terms that Kubernetes basically redefines, and some new ones. As a way to prevent confusion, here's a list of the worst offenders together with most used definitions in Kubernetes:
Pod- group of one or more containers that share a network. Lowest tier of workloads in Kubernetes.CPorcontrol plane- administrative Kubernetes layer that runs the most important Kubernetes components.worker- a compute unit that doesn't run any control plane components.Node- in Kubernetes, a node is a physical or virtual machine that can run a workload. It doesn't matter if it's control plane or worker.cluster- in Kubernetes context, this means a set of nodes (at least 1 CP), that have been aggregated into the same failure and trust domain by the Kubernetes components.CNI- Container Network Interface. A standard that facilitates communication between container run-times and network plugins. Often also used to mean the networking software that uses the standard to provide networking for the Kubernetes cluster.Service- A Kubernetes resource object that defines a logical set of Pods and a policy to access them.Namespace- A Kubernetes resource object that allows for the segregation of cluster resources between multiple users or environments.Ingress- in Kubernetes context, usually means the Kubernetes resource objectIngress, which definesIngressControllerroutes.API server- in Kubernetes context, this usually means the Kubernetes control plane component calledkube-apiserver.Labels and Selectors- in Kubernetes context, allow for organizing and selecting subsets of objects based on key-value pairs.kubectl- a command-line tool for interacting with Kubernetes clusters.scheduler- in Kubernetes context, this usually means the Kubernetes control plane component calledscheduler.
Kubernetes components
As shown in the lecture, a working Kubernetes cluster consists of multiple components working in unison.
kube-apiserver
Acts as the main management point of the entire cluster. Handles and processes REST requests and updates object states in etcd. You interact with this using kubectl, and all other cluster components and utilities are tied together by this component.
In your case, it's going to run on only the first node you set up - control plane node - as a container, exposed on port 6443.
etcd
Stores configuration data of the cluster, acting as the “source of truth” for the cluster. Usually run in a distributed method, where you have multiples of the component in a single cluster, so a single failure could not bring the cluster down.
In your case, it's going to run on only the first node you set up - control plane node - as a container.
scheduler
Constantly probes the API server for unscheduled workflows (pods) and assigns them onto worker nodes, based on specific criteria. Considers factors like individual and collective resource requirements, hardware/software/policy constraints, data locality, inter-workload interference, and deadlines while scheduling.
In your case, it's going to run on only the first node you set up - control plane node - as a container.
controller-manager
Constantly probes the API server for the defined cluster state, and compares it against the current cluster state. If a change is detected, works to rectify any divergences between the states.
In your case, it's going to run on only the first node you set up - control plane node - as a container.
kube-proxy
Responsible for handling network communication both cluster internally, and also externally. Usually handles firewall rules, node-to-node routing, pod-to-pod routing, OS port to pod routing.
In your case, it's going to run on all the nodes as a container.
kubelet
Responsible for listening for commands from the control plane, and “converting” the commands into local container runtime or operating system (network, filesystem) tasks. Also handles node registration, pod creation/deletion, and status reporting, by continuously collecting and sending runtime metrics to control plane.
In your case, it's going to run on all the nodes, as a systemd unit.
Info
The cluster you setup is going to be one CP node, that can also run workloads, and two worker nodes.
Installing Kubernetes
In the labs, you're going to use the so-called "vanilla" Kubernetes distribution, which uses Kubeadm as management tooling.
Using this tooling, you can install, configure, update, and manage your Kubernetes cluster.
Preparing the nodes
Before you can go onward with installing Kubernetes, there's a few you need to complete on the existing node.
You're going to use the machine you setup in labs 1 and 2 as the Control Plane node, meaning it runs all the cluster components. Later on, you'll be adding a two more VMs to act as worker nodes.
In the previous labs you setup containerd in a kind-of tied down form. You'll now need it to work with Kubernetes, so there's a few things to change.
Complete
Make sure you have completed the entirety of the containerization lab. The Kubernetes cluster you're installing will use containerd container engine.
Now, configure containerd to use the default configuration:
containerd config default | sudo tee /etc/containerd/config.toml
You can view the output of containerd config default yourself, and see how many options there are.
Now you also need to enable systemd cgroup method, this allows Kubernetes and system control groups to be tied together in a way where the whole system runs in a better way due to this. More about this in the later labs.
Find the following section: [plugins."io.containerd.grpc.v1.cri".containerd.runtimes.runc.options], and change the value of SystemdCgroup to true. It should look like this:
[plugins."io.containerd.grpc.v1.cri".containerd.runtimes.runc.options]
  BinaryName = ""
  CriuImagePath = ""
  CriuPath = ""
  CriuWorkPath = ""
  IoGid = 0
  IoUid = 0
  NoNewKeyring = false
  NoPivotRoot = false
  Root = ""
  ShimCgroup = ""
  SystemdCgroup = true // (1)
The change is in the last line.
Also, update the version of the registry.k8s.io/pause image to 3.10 in the containerD configuration under the plugins."io.containerd.grpc.v1.cri block. It should look like this:
[plugins."io.containerd.grpc.v1.cri"]

   sandbox_image = "registry.k8s.io/pause:3.10"
You will also need to reboot the containerd service.
Once this has been completed, you can continue with setting up the rest of the node, preparing it for Kubernetes.
Complete
Set the timezone to UTC for your machine, you can do this with the timedatectl command.
Please also open the following ports for your Virtual Machine in ETAIS using security groups:
4240/tcp- used for the CNI we will use.6443/tcp- used for control plane API communications.8472/udp- used for the CNI we will use.10250/tcp- used for talking with the node component called Kubelet.30000-32767/tcp- used for publishing services.
And also enable the following sysctl settings:
net.ipv4.ip_forward = 1
And make sure to make these persistent across reboots. You can do this for sysctl by adding them appropriately to a file in /etc/sysctl.d/<file>.conf folder. And apply the change without reboot of the VM: sudo sysctl --system
Also, disable SELinux for now - it is possible to run clusters with SELinux enabled, but it's a different beast entirely, and when learning Kubernetes it will cause a lot of extra problems.
# Set SELinux in permissive mode (effectively disabling it)
sudo setenforce 0
sudo sed -i 's/^SELINUX=enforcing$/SELINUX=permissive/' /etc/selinux/config
You can find more information here.
Verify
You can use the sysctl -a command to verify if the setting have been applied.
SELinux can be checked with the getenforce command.
Checking ports is a bit more difficult. As the node does not have anything listening on the ports, the ports will not show up as open status.
You can either:
- make something (like
nc) listen on the ports, and portscan from your machine. - wait until you have setup Kubernetes enough that there's a service listening on the ports - and portscan then.
Complete
Install the socat Linux package.
Now that the node has been prepared, you can continue with setting up the Kubernetes management software - kubelet.
Installing Kubeadm, kubelet and kubectl
Kubeadm is a tool built to provide best-practice fast paths for setting up Kubernetes clusters. It performs the necessary steps to get a minimum viable cluster.
By design, it cares only about bootstrapping the cluster - it's not meant for provisioning machines, installing plugins (mandatory nor nice-to-have), nor monitoring solutions.
This methodology is perfect for running a self-contained bloatware-less cluster, which follows the best practices and is understandable for the admins.
You'll need to install the main three binaries to get Kubeadm ready to create a cluster:
kubeadm- the Kubeadm binary itself.kubelet- the node agent that each Kubernetes node needs to run.kubectl- the Kubernetes command-line tool for simplifying administrative access to the cluster.
Danger
Make sure to install version 1.33.5 of Kubernetes.
You'll be using a slightly older version than latest due to the following reasons:
- While 1.34 is out, the tools that you'll be running in your cluster might not have 1.34 compatibility yet.
- We can demonstrate upgrading from 1.33 -> 1.34 in later labs. If you install the latest version from get-go, there's going to be no new minor version to update to.
Complete
This part is about following the Kubernetes public documentation for RedHat-based distributions.
Enable the Kubernetes package repository for CentOS by doing the following:
# This overwrites any existing configuration in /etc/yum.repos.d/kubernetes.repo
cat <<EOF | sudo tee /etc/yum.repos.d/kubernetes.repo
[kubernetes]
name=Kubernetes
baseurl=https://pkgs.k8s.io/core:/stable:/v1.33/rpm/
enabled=1
gpgcheck=1
gpgkey=https://pkgs.k8s.io/core:/stable:/v1.33/rpm/repodata/repomd.xml.key
exclude=kubelet kubeadm kubectl cri-tools kubernetes-cni
EOF
Run dnf makecache afterwards, making sure the list of packages gets downloaded.
Then you can check the appropriate version to install with the following command: dnf search --showduplicates --disableexcludes=kubernetes <package>
The repository gets disabled by default, so automatic updates or yum update would not update the cluster. Updating accidentally could have disasterous effects, as the whole cluster needs to stay on the same version.
After finding the correct packages, install them by doing:
dnf install kubelet-1.33.5-150500.1.1.x86_64 kubeadm-1.33.5-150500.1.1.x86_64 kubectl-1.33.5-150500.1.1.x86_64 --disableexcludes=kubernetes
And then startup kubelet using systemd, and make it persistent across reboots.
Verify
Verification of this step is rather simple - the installation should have succeeded. If not, take a moment to check where you went wrong.
Also, when you check the status of kubelet service, it's going to be in a crashloop. This is because we haven't told it what to do yet, using kubeadm.
Once you have a running (well, technically crashlooping) kubelet service, you can start with creating a Kubernetes cluster.
Create a Kubernetes cluster
There are two ways to initialize a Kubernetes cluster - a quickfire way over the command line, or by specifying a configuration file.
You'll be using a configuration file, as that option is more reproducible and understandable.
Bug
You will be setting up a single control-plane node, which can also run workloads. Later on you will add two worker nodes as well.
This is not the recommended best-practice way of running a Kubernetes cluster.
The best practice way is to have at least 3 control-plane nodes for load balancing and failure tolerance reasons. These control-plane nodes should work only on running services and tools necessary for the whole cluster.
For workloads, you'd instead add worker nodes to the cluster.
You're running in a smaller capacity to simplify management, make understanding easier, and reduce resource consumption.
Going from a single control-plane node to a full-fledged cluster, after understanding Kubernetes properly, is a trivial endevour, but the cluster has to be initialized with that in mind.
The controlPlaneEndpoint setting needs to point to an IP/domain name that routes the traffic to all control plane APIs - usually this is done via a proxy. In this course, you'll use your first control plane VM IP as the controlPlaneEndpoint.
Complete
First, prepare a Kubeadm YAML configuration file. The name and location are not relevant.
You will need to change some settings here.
---
apiVersion: kubeadm.k8s.io/v1beta3
kind: ClusterConfiguration
controlPlaneEndpoint: "<VM external IP>:6443"
networking:
  dnsDomain: cluster.local
  podSubnet: "10.217.0.0/16"
  serviceSubnet: "10.96.0.0/12"
apiServer:
  extraArgs:
    advertise-address: "<VM external IP>"
---
apiVersion: kubeadm.k8s.io/v1beta3
kind: InitConfiguration
nodeRegistration:
  name: "<your vm name>.cloud.ut.ee"
  criSocket: "unix:///run/containerd/containerd.sock"
---
kind: KubeletConfiguration
apiVersion: kubelet.config.k8s.io/v1beta1
cgroupDriver: "systemd"
shutdownGracePeriod: 5m0s
shutdownGracePeriodCriticalPods: 5m0s
---
Once you have filled in this file, and written it to your VM, you can initialize your cluster by doing the following:
kubeadm init --config=<config location>/<config file>.yaml
If you want to see properly what this command does, you can append --v=9 to it. Then it will print out all the calls it does while initializing the cluster.
Verify
After running the command, you should get a lot of messages. It can take a while, as it also pulls images, starts them as containers, and waits for them to startup. You can get an overview of tasks made by this command here . By the end, you should receive a message like this:
Your Kubernetes control-plane has initialized successfully!

To start using your cluster, you need to run the following as a regular user:

mkdir -p $HOME/.kube
sudo cp -i /etc/kubernetes/admin.conf $HOME/.kube/config
sudo chown $(id -u):$(id -g) $HOME/.kube/config

Alternatively, if you are the root user, you can run:

export KUBECONFIG=/etc/kubernetes/admin.conf

You should now deploy a pod network to the cluster.
Run "kubectl apply -f [podnetwork].yaml" with one of the options listed at:

https://kubernetes.io/docs/concepts/cluster-administration/addons/

You can now join any number of control-plane nodes by copying certificate authorities
and service account keys on each node and then running the following as root:

kubeadm join 172.17.1.1:6443 --token abcd12.r7vsu1keh193typx \
        --discovery-token-ca-cert-hash sha256:831d55931749cb150f60594ecf4631b877a865e8fea2873834de2b35ec2ec002 \
        --control-plane

Then you can join any number of worker nodes by running the following on each as root:

kubeadm join 172.17.1.1:6443 --token abcd12.r7vsu1keh193typx \
        --discovery-token-ca-cert-hash sha256:831d55931749cb150f60594ecf4631b877a865e8fea2873834de2b35ec2ec002
This means, that the initialization succeeded. The new cluster is still waiting for a CNI - you'll get to it.
Danger
If the init does not complete successfully, or the following kubectl commands do not work, then double check that you have not skipped any configuration steps. Also, double check that you opened nessesary ports! If you find fix something, you may need to tear down the cluster and run the init command again. At this stage, you can tear he cluster down by running the kubeadm reset command.
Complete
To use the following kubectl commands, you need to configure the location of the admin.conf file of the cluster.
Follow the initial steps outlined in the output of the previous kubeadm init command to configure the location of the amdin configuration file for the normal user.
However, DO NOT run the kubeadm join commands yet.
After doing the mkdir, cp and chown commands, you should be able to run kubectl get nodes, and see a response something like this:
[root@teacher-test ~]# kubectl get nodes
NAME                       STATUS   ROLES           AGE   VERSION
teacher-test.cloud.ut.ee   Ready    control-plane   39m   v1.35.5
Complete
Because we want to be able to run workflows on our new control plane, make sure to remove the taint that prevents normal workflows from running on control planes:
kubectl taint nodes --all node-role.kubernetes.io/control-plane-
Basics of the command line tool
You'll mainly use the kubectl command line tool, at least in the first part of the course, to manage the cluster. This is because kubectl is the default and main way Kubernetes is interacted with.
kubectl is a command-line tool that interacts with the API server of a Kubernetes cluster and allows you to deploy and manage applications, inspect and manage cluster resources, and view logs. It uses a configuration file, usually located at ~/.kube/config, to determine the cluster's details and authentication information.
The basic operations include, but are not limited by:
kubectl get- get an object in the API, for examplekubectl get nodes.kubectl describe- describe an object and their metadata in the API, for examplekubectl describe nodes.kubectl apply- apply a resource manifest into the API, for examplekubectl apply -f manifest.yaml.kubectl delete- delete a resource from the API, for examplekubectl delete -f manifest.yaml.kubectl edit- edit an existing resource in the API, for examplekubectl edit service/kubernetes.
Another thing to keep in mind that Kubernetes has two versions of resources - cluster wide, and namespaced resources.
Cluster wide resources are usable across the whole cluster. Good examples are ClusterRoles - roles which give access to cluster-level resources. You can view them with kubectl get clusterrole. By default, there's quite a few, which are already required for base Kubernetes to work.
On the other hand, if you try to view pods with kubectl get pods, the output is going to be No resources found in default namespace.. But you already have control plane components running inside the cluster. How can that be?
The answer is, that the control plane components live inside a namespace called kube-system. You can view the pods in this namespace by doing kubectl get pods -n kube-system. This lists you all the main components a Kubernetes consists of, and because of this, kube-system is the most important namespace for Kubernetes.
Namespaces are a way to divide cluster resources between multiple users, groups, and systems. By utilizing namespaces, the cluster administrators can "hide away" all system level resources from users, and give them access only to the ones they care about. This is what makes Kubernetes such a wonderful orchestration tool - you can give each user or team their own namespace, and they will feel like they're alone in the cluster.
Installing a CNI
You setup a container networking interface (CNI) in the second lab to enable networking for your containers. A Kubernetes CNI is similar, but way more complicated. The main purpose of CNI in Kubernetes is:
- Giving a network address to all the resources like pods, services, endpoints.
- Connecting these networks together across different hosts, by utilizing complicated network technologies like overlay networks or encapsulation.
- Making the resource addresses routable - connectable - for all other resources and hosts in the Kubernetes cluster.
- Usually also allowing for firewall rules, in Kubernetes with
NetworkPolicyobjects, which are going to be covered in later labs. - Providing egress, meaning outgoing, network connectivity for all containers.
There are many different CNI systems available for Kubernetes, and the one you use depends on your Kubernetes distribution, OS, hardware, software, requirements and many other things. Good examples are:
flannel- most simple CNI, easiest to get running.calico- most configurable, secure and performant CNI for quite a long time, but now superseded by..cilium- an extremely secure, configurable and performant CNI that also supports many advanced features like border gateway protocol (BGP), direct server return, cluster meshing, and so on.
You'll be using cilium in this course, as it provides some very good observability tools, which are going to make understanding and debugging the cluster easier.
Cilium quick installation isn't a very pleasant way of installing software into Kubernetes, nor is it the recommended way, but as the main way of packaging software, called helm, basically requires it's own weekly topic, you'll start off with the ugly - but quick - way.
Complete
This part is about completing the cilium guide here .
First, run the cilium binary setup script:
CILIUM_CLI_VERSION=$(curl -s https://raw.githubusercontent.com/cilium/cilium-cli/main/stable.txt)
CLI_ARCH=amd64
if [ "$(uname -m)" = "aarch64" ]; then CLI_ARCH=arm64; fi
curl -L --fail --remote-name-all https://github.com/cilium/cilium-cli/releases/download/${CILIUM_CLI_VERSION}/cilium-linux-${CLI_ARCH}.tar.gz{,.sha256sum}
sha256sum --check cilium-linux-${CLI_ARCH}.tar.gz.sha256sum
sudo tar xzvfC cilium-linux-${CLI_ARCH}.tar.gz /usr/local/bin
rm cilium-linux-${CLI_ARCH}.tar.gz{,.sha256sum}
This puts a binary called cilium into your /usr/local/bin folder.
Now you can run the installation:
/usr/local/bin/cilium install --version 1.18.1 --set hubble.ui.enabled=true --set hubble.relay.enabled=true --set operator.replicas=1 --set hubble.relay.tls.server.enabled=false --set hubble.tls.enabled=false
This command tells cilium to install version 1.18.1, and enable hubble UI and relay services, which are necessary for network visualization. We turn the count of replicas to 1 to conserve resources, and disable TLS for hubble, as we cannot generate TLS certificates yet.
It should run for a bit, but run through successfully.
Verify
First check, how new pods are being created into the kube-system namespace, namely cilium, cilium-operator, hubble-ui and hubble-relay. These are the pods that provide CNI and network connectivity to the cluster.
The easiest way to verify cilium state is using cilium status command. It should give you all the issues. Give it a little time though after installation, it takes time for images to get downloaded, started up and the network layer to be configured.
When the cilium status is all green, you can also run the cilium connectivity test command. This command will take a while, but in the end, it should succeed with all relevant tests.
Setup worker VM
Similarly to how you setup a VM in ETAIS self-service, you'll also have to setup another two worker nodes. You don't have install consul or go through with giving scoring access though.
Complete
Create two virtual machines to be used as a worker node into your ETAIS self-service project:
VM name=the alias you chose-worker-a (andthe alias you chose-worker-b)Image=centos9Flavor=g4.r8c4System Volume Size= 100 GBSystem Volume Type=prod3 (IOPS intensive SSD)Data Volume Size= Do not activate!SSH public key=the public key that you created beforeNetworks= changeSkip floating IP assignmenttoAuto-assign Floating IPSecurity Groups= keepdefaultaddsshandping
Complete the installation of containerd and iptables from the previous lab for both of the new VMs.
And complete the node setup steps from the beginning of this lab for both new VMs, like you did for the control plane node.
Also, setup the kubeadm, kubectl and kubectl components.
Firewall ports wise, we do not require 6443/tcp to be open, but for simplicity sake you can use the same security group as for control plane.
Verify
You should have two new virtual machines, that have a working containerd, and also kubeadm, kubectl and kubelet installed.
Joining the worker nodes to the cluster
Similarly to the initialization command, you're going to use Kubeadm to join the nodes to the cluster as well. But before that, you need to obtain some kind of authentication method for the worker nodes to authenticate to the control plane.
There are several methods a cluster administrator can use to do this, but you'll use the default one - Token-based discovery with CA pinning. This means that the control plane generates a token, with which the worker node makes an initial connection. The worker node validates the control plane node with the Kubernetes control plane CA certificate hash. If everything works, and initial connection succeeds, all nodes agree to a TLS client certificate, which to use for further operations.
Steps taken by a joining node, which are the worker nodes in your case:
- Joining node's Kubeadm downloads necessary cluster information from the API server. It uses the bootstrap token and the CA key hash to verify the authenticity of that data.
- Once the cluster information is known, kubelet can start the TLS bootstrapping process.
- The TLS bootstrap uses the shared token to temporarily authenticate with the Kubernetes API server to submit a certificate signing request (CSR); by default the control plane signs this CSR request automatically.
- Finally, Kubeadm configures the local kubelet to connect to the API server with the definitive identity assigned to the node.
If instead of a worker node, you'd be adding a control plane node, the following extra steps would be performed:
- Downloading certificates shared among control-plane nodes from the cluster.
- Generating control-plane component manifests, certificates and kubectl configuration file.
- Adding a new local
etcddata store member.
Complete
First, on your control plane node, generate a token:
kubeadm token create --print-join-command
This gives you an output, and this output actually is a working join command, if you want to join with default values - but we do not.
Mark down the values for --token and --discovery-token-ca-cert-hash options.
Now, take the default values for joining a node, by running this command on the control plane:
kubeadm config print join-defaults
This will give you a file you can use for joining, but you'll need to change it a bit to conform to our environment and standards.
apiVersion: kubeadm.k8s.io/v1beta4
caCertPath: /etc/kubernetes/pki/ca.crt
discovery:
  bootstrapToken:
    apiServerEndpoint: kube-apiserver:6443
    token: abcdef.0123456789abcdef
    unsafeSkipCAVerification: true
  timeout: 5m0s
  tlsBootstrapToken: abcdef.0123456789abcdef
kind: JoinConfiguration
nodeRegistration:
  criSocket: unix:///var/run/containerd/containerd.sock
  imagePullPolicy: IfNotPresent
  name: teacher-worker-a.cloud.ut.ee
  taints: null
First, remove the tlsBootstrapToken and unsafeSkipCAVerification lines, as you will use discovery token, and you'll do it in a secure way.
Then, change apiServerEndpoint, token, criSocket and name to appropriate values. Similar ones as when you initialized the cluster. For node name, use <worker-name>.cloud.ut.ee.
And finally, add a discovery.bootstrapToken.caCertHashes variable as a list, and add your --discovery-token-ca-cert-hash option value there.
The option should look something like this:
discovery:
  bootstrapToken:
    caCertHashes:
    - sha256:abcasdasdasd-98adfsg-09uasdoiphasoip0gha0s9dygu
Also, append the KubeletConfiguration part from control plane creation on top of this file:
---
kind: KubeletConfiguration
apiVersion: kubelet.config.k8s.io/v1beta1
cgroupDriver: "systemd"
shutdownGracePeriod: 5m0s
shutdownGracePeriodCriticalPods: 5m0s
---
Once done, you can try to join your worker node to the cluster:
kubeadm join --config join.yaml
Verify
Success here is easy to quantify, if the command succeeds with the message This node has joined the cluster, you have succeeded.
If that is not the case, you might need to check your join configuration, and try again. You might also need to do a kubeadm reset on the worker, before trying again.
If you succeeded, you should also see a new node in the kubectl get nodes list.
Something to notice, also, is that the worker node has no access to the cluster-wide administrative kubectl configuration file. This is by design, and this means that while you can do a lot of bad with a compromised Kubernetes worker, you can't fully take over the control plane, at least not without any extra vulnerabilities.
When you now check which pods are created in the cluster, kubectl get pods --all-namespaces to view all namespaces, you can see that some pods are instantly started on the worker node, the most important of which are cilium for networking, and kube-proxy to allow for service access, if some workload would require it.
Test Kubernetes
As a way to test that all the parts of Kubernetes work together, you'll run a basic container - echo - inside a pod. The container is simple - it listens for HTTP requests, and prints back all the information it receives as the response to the HTTP request. It'll be helpful later on to debug the Kubernetes, networking and also the applications.
Bug
Running single pods inside Kubernetes, without a workload controlling them, is usually not recommended, as when something happens to the node which runs the pod, it won't be started back up again.
You'll be running the pod just to see it's possible, why it's not a good idea, and to keep things simple this week. In the next weeks, you'll convert it into a proper workload.
Deploying objects to Kubernetes can be done in two ways - in an ad-hoc, single kubectl command kind of way, for example: kubectl run echoserver --image=registry.hpc.ut.ee/mirror/ealen/echo-server:latest --port=80.
That's not a good way though, as it's not declarative. Instead, do it like intended - create an object manifest, a YAML file, with the resource definition inside, and use kubectl apply on it. This makes also managing the workload easier, as if you make a mistake, you can edit the file, and run kubectl apply again, to bring the cluster into correct state.
Complete
Run the echoserver image in Kubernetes, using proper manifest files, by first creating a pod.yaml file.
This file should consist of the following:
apiVersion: v1
kind: Pod
metadata:
  name: echoserver
  labels: # (1)
    app: echoserver
spec:
  containers:
    - name: echoserver
      image: registry.hpc.ut.ee/mirror/ealen/echo-server:latest
      ports:
        - containerPort: 80
      env:
        - name: PORT
          value: "80"
- The
labelsis some extra metadata that can be used to refer to a resource inside a single namespace.
If you run kubectl apply -f pod.yaml on it, it should create a pod named echoserver in the default namespace of your Kubernetes cluster.
Verify
You can check whether the pod is in Running state, and to take a step even further, let's run a HTTP query against it.
First, find the IP address of the pod from the output of kubectl describe pod/echoserver.
Then, run a curl against that IP address, and pipe it into jq. You should receive a proper HTTP JSON response.
While now you have a working singular workload, it's very hard-coded. Every time you delete and re-create the pod, it'll receive a new IP address. That's not a very pleasant way to use anything.
Solving this requires you to also define another resource, called a Service. A service is a logical abstraction deployed on top of pods, which allows a group of pods to be given a single IP address, and domain name. You'll be using Service type ClusterIP, which gives the pods it points to a single static IP address (and domain name) inside the cluster.
Complete
Add a new segment to the existing pod.yaml file. Remember, different resources in the same YAML file have to be delimited by ---.
apiVersion: v1
kind: Service
metadata:
  name: echoserver
spec:
  ports:
    - port: 80
      targetPort: 80
      protocol: TCP
  type: ClusterIP
  selector:
    app: echoserver # (1)
- The service uses label
selectorto point at the correct pod. The pod has to have a label withapp: echoserverdefined for the service to find it.
Once your file consists of both the pod and service manifests, run kubectl apply -f pod.yaml on it again. It should give you output about a service being created.
Verify
Check the services list inside the default namespace via kubectl get services.
The echoserver service should have a CLUSTER-IP and PORT(s). When you curl this IP address, you should receive the same response as with directly curl-ing the pod address.
But now, when you delete the pod with kubectl delete pod/echoserver, and run the kubectl apply again, you'll see that the pod's IP address has changed, but curl-ing the service address still works.
Test networking
As a test to see whether the networking works properly, you can create a way to access cilium's hubble component from outside the machine. This component draws a graphical UI about traffic inside the cluster.
Doing this requires you to edit a Kubernetes service object, that was already created during the installation of cilium. The problem is, it was created in a service type ClusterIP, which makes the service available only inside the local Kubernetes cluster.
You need to change it into a NodePort service type, so each Kubernetes node allocates a service for this component, and internally routes traffic so that whichever node you connect to, the traffic always hits the component - even if you connect to the worker node, while the component actually runs on control plane.
Complete
Using the kubectl edit command, edit the object service/hubble-ui in kube-system namespace.
Change the following options:
- Modify
spec.typefromClusterIPtoNodePort - Add the
nodePortkey to the first item inspec.portsand set its value to31000
Save.
Verify
When using the browser to go to either of your nodes address, port 31000, you should receive an UI. You can choose a namespace to have a look which network connections between which objects take place.
If the Hubble user interface does not show any data, verify Cilium is working properly using status and test commands. If nothing else works, you can tell Cilium to disable Hubble and enable it again using the commands cilium hubble disable and then cilium hubble enable --ui.
Definitely use the kube-system namespace, as others barely have anything deployed into it.
Your cluster currently is rather timid, it might take a while until some graphs show up. Later on though, when you'll be writing firewall rules, this tool helps with understanding how network traffic moves, together with the verdicts.
Advanced client tools
As preparation, you'll also go over more useful kubectl functionalities, and also have a look into more intuitive ways to manage the cluster.
kubectl
As said before, kubectl is the main management tool for Kubernetes clusters. While it's just basically a translator, converting the command line calls into REST API queries, and appending the authentication configuration to the queries, it's still an extremely powerful and extensible tool.
You can start exploring the whole REST API with kubectl by doing: kubectl get --raw /
The --raw option, instead of converting commands, basically becomes glorified curl which sends requests to specific paths you specify. As a response, you can see the list of all the valid endpoints. Going further down, you'll be able to see the different endpoints and settings you can query from the API.
You can also see which commands are run by appending --v=9 to any kubectl command, similarly to kubeadm. This is going to show you the full curl command executed by the kubectl binary for any command, together with the request and response headers.
You can get the whole list of resources manageable with kubectl with the command kubectl api-resources.
You can also:
- Copy files into containers with:
kubectl cp --tar /my/local/directory mypod:/my/pod/directory - Create
kubectlplugins, by creating files in$PATHwith the prefixkubectl-. - For example, a file
/usr/local/bin/kubectl-hellocould be executed throughkubectlwith the commandkubectl hello. - Read container logs:
kubectl logs pod/<podname> - Compare current resource state to a file:
kubectl diff -f <filename>.yaml - Port forward a pod or service from the cluster to your local machine:
kubectl port-forward svc/my-service 8080:80 - This is useful only if you run the
kubectlon your personal computer, which you can easily do. - Then you can access resources in the cluster easily, without having to expose them to the world.
Kubernetes permission system
Even more advanced, kubectl can tell you whether the user you're using has enough permissions to access a resource:
kubectl auth can-i list pods --namespace=default
Currently you're using the cluster administrator user, so obviously you can, but if you have normal user permissions, then it's very easy to use this methodology, without changing anything.
And in case you're, instead, a cluster administrator, and trying to show or prove to a user that they can access, you can impersonate their user or group.
The following command checks whether a random, non-existent user username could query the pods in default namespace when in a group called system:authenticated. This group is something anyone, who has authenticated with the cluster, has. You'll notice that it says it can't list pods in the default namespace:
kubectl auth can-i list pods --namespace=default --as=username --as-group=system:authenticated
Instead, check if it can create a SelfSubjectRulesReview object:
kubectl auth can-i create SelfSubjectRulesReview --as=username --as-group=system:authenticated
Info
You can see which roles are available in the cluster with kubectl get clusterroles. The thing to note is that these clusterrole definitions are non-namespaced, meaning they usually provide access to whole cluster.
There's also namespaced version of them: kubectl get roles -n kube-system. These are used to give access to resources inside specific namespaces.
Roles and cluster roles are bound to specific users and groups via namespaced rolebinding or non-namespaced clusterrolebinding objects, by definining which users or groups should be bound to which roles.
But .. something to keep in mind is that there's no explicit users or groups in Kubernetes.
Kubernetes, by default, fully trusts the TLS certificates, if they have been signed by the cluster's CA certificate key.
Example
Just to see how it works, open up a kubectl configuration file's TLS certificate, by first doing:
grep client-certificate-data <kubectl-config>.conf
The result is in key-value format. If you now take the value part, and decode it as base64, you'll get a TLS certificate:
grep "client-certificate-data" <kubectl-config>.conf | awk '{print $2}' | base64 -d
Write this to file, and print the certificate information with openssl.
openssl x509 -in <certificate_file> -noout -text
You'll notice the subject line is something like this: Subject: O = system:masters, CN = kubernetes-admin
The O stands for Organization, or group inside the Kubernetes.
The CN stands for Common Name, or user name inside the Kubernetes.
This means that the /etc/kubernetes/pki, where the Kubernetes API server CA key is located, is one of the most important and sensitive locations in the whole cluster. A compromised CA key means compromised cluster.
k9s
Info
This is not a mandatory part of the lab! It'll just introduce you to other ways of managing the cluster in a more visual way, which you might or might not decide to use.
kubectl is a nice and powerful tool, but Kubernetes tends to grow very quickly. Larger clusters nowadays have up to 100 thousand nodes. That's too much text for a person to handle normally.
Thankfully, there are visual methods available, as well. One of them is still a command-line based, but visual tool, called k9s. This is a tool that still runs inside the terminal, but makes searching and viewing the cluster much more simple. A demonstration (click twice to play):

The problem with this tool, as with most command-line tools, is that you need to know the shortcuts and commands to be efficient with it, but once you are, you'll be unstoppable. Installation is fairly straightforward, and if everything else fails, you can just download the binary from their GitHub page, and run that.
Lens
Info
This is not a mandatory part of the lab! It'll just introduce you to other ways of managing the cluster in a more visual way.
Another, even more graphically pleasant way is something called Lens. This is a full Kubernetes IDE, which runs as separate software inside your personal computer.
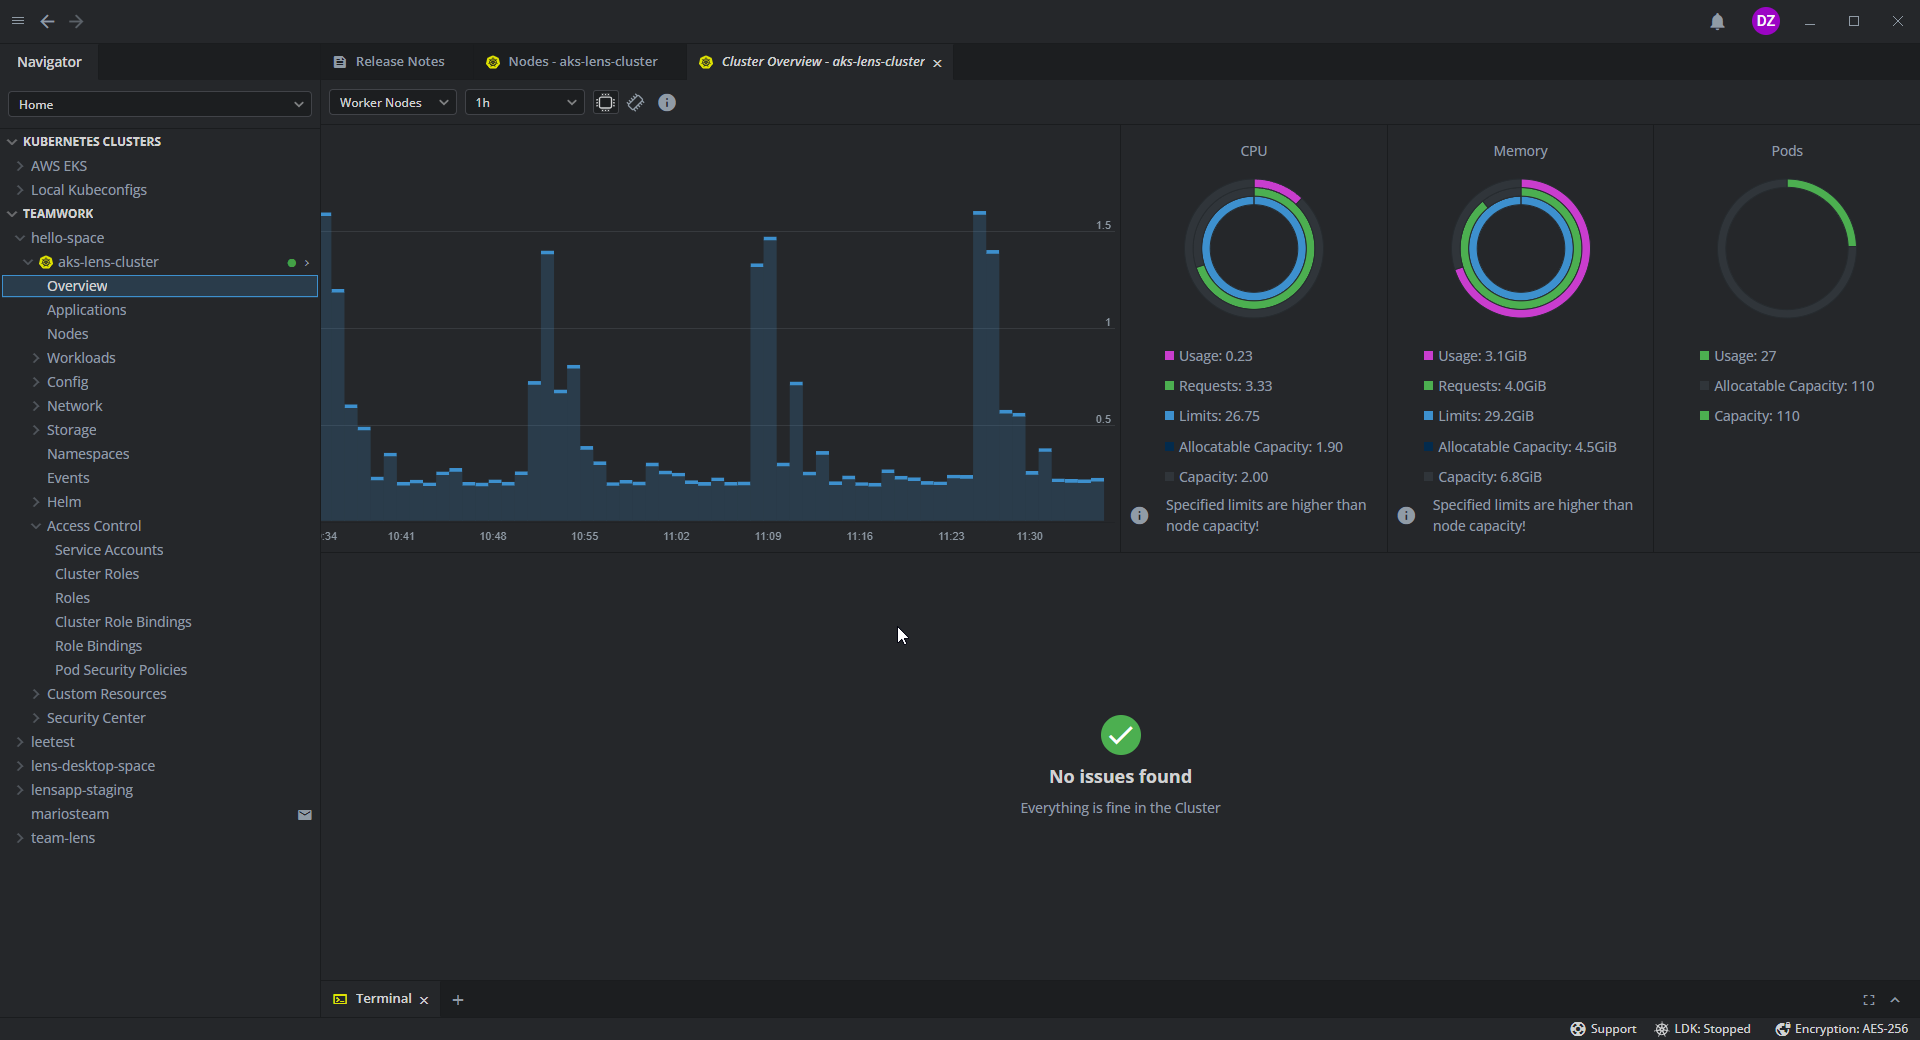
lens does not make it much easier to create workflows, but finding/viewing/searching/managing/editing/scaling/deleting resources is much more intuitive than through kubectl, especially if you have a bunch of them. It also supports useful plugins and integrations, like directly integrating with the cluster's monitoring system (if you have one) to make metrics easily available.